


How to Update Photo in Aadhaar
How to Update Photo in Aadhaar Aadhaar, issued by the Unique Identification Authority of India (UIDAI), serves as the primary identity document for over 1.3 billion residents. It is used for everything from opening bank accounts and filing tax returns to accessing government subsidies and mobile SIM verification. Over time, changes in appearance—due to aging, medical conditions, weight fluctuation
How to Update Photo in Aadhaar
Aadhaar, issued by the Unique Identification Authority of India (UIDAI), serves as the primary identity document for over 1.3 billion residents. It is used for everything from opening bank accounts and filing tax returns to accessing government subsidies and mobile SIM verification. Over time, changes in appearancedue to aging, medical conditions, weight fluctuations, or simply a desire for updated identificationcan render an old Aadhaar photo inaccurate or unrecognizable. This discrepancy can lead to authentication failures, service denials, or delays in critical transactions. Updating your photo in Aadhaar ensures your identity document remains current, reliable, and fully functional across all digital and physical platforms that require verification. This guide provides a comprehensive, step-by-step walkthrough on how to update your photo in Aadhaar, including best practices, essential tools, real-world examples, and answers to frequently asked questions.
Step-by-Step Guide
Updating your photograph in Aadhaar is a straightforward process that can be completed either online or in person at an Aadhaar enrollment center. While the online method is convenient, it is limited to certain conditions. For most users, visiting an enrollment center is the most reliable and universally applicable option. Below is a detailed breakdown of both methods.
Method 1: Updating Photo at an Aadhaar Enrollment Center
This is the standard and recommended approach for all users seeking to update their photograph. The process requires a physical visit and verification but ensures accuracy and compliance with UIDAI guidelines.
- Locate the Nearest Aadhaar Enrollment Center
Visit the official UIDAI website at uidai.gov.in and navigate to the Locate Enrolment Center section. Use your state, district, or pin code to find the closest center. Note the centers operating hours and whether appointments are required. - Prepare Required Documents
Bring your existing Aadhaar card or Aadhaar number. Although not mandatory, carrying a valid proof of identity (POI) and proof of address (POA) such as a passport, driving license, or voter ID can expedite the process. No additional documents are needed solely for photo updates, but having them on hand is prudent. - Visit the Enrollment Center
Arrive at the center during operating hours. Upon arrival, inform the operator that you wish to update your photograph. You will be directed to a designated kiosk or counter for biometric and photo capture. - Provide Biometric Authentication
The operator will ask you to verify your identity using your fingerprints or iris scan. This step confirms that you are the legitimate holder of the Aadhaar number and prevents unauthorized changes. - Capture New Photograph
You will be asked to sit in front of a high-resolution camera. The operator will guide you to position your face correctlyfacing forward, eyes open, no headwear (unless for religious reasons), and no shadows on your face. The system captures a live photo, which is immediately reviewed for quality. - Review and Confirm
Once the photo is captured, you will be shown a preview on a screen. Carefully check the image for clarity, lighting, and alignment. If satisfied, confirm the update. If not, you may request a retake. - Receive Acknowledgment Slip
After successful submission, you will be given an acknowledgment slip with a unique reference number. Keep this slip safe. It will be needed to track the status of your update. - Wait for Processing
The update typically takes 5 to 15 working days. During this time, UIDAI validates the photo, cross-checks biometrics, and updates the central database. - Download Updated Aadhaar
Once processed, you can download your updated Aadhaar card from the UIDAI website using your Aadhaar number and the security code sent to your registered mobile number or email. The new photo will be visible in the downloaded PDF.
Method 2: Online Photo Update (Limited Availability)
As of current UIDAI policy, online photo updates are not generally available to the public. Unlike address or mobile number updates, which can be done via the Self Service Update Portal (SSUP), photo updates require physical biometric verification for security reasons. This restriction exists to prevent identity fraud and ensure the integrity of the Aadhaar ecosystem.
There are rare exceptions for individuals under specific UIDAI-approved programs, such as those in remote areas with mobile enrollment units or special outreach campaigns. However, these are not standard procedures and cannot be relied upon. For the vast majority of users, visiting an enrollment center remains the only viable option.
Be cautious of third-party websites or apps claiming to offer online photo updates. These are often scams designed to harvest personal data or charge unnecessary fees. Always use the official UIDAI portal or visit a government-authorized center.
Best Practices
To ensure a smooth and successful photo update process, follow these industry-tested best practices. These tips are derived from UIDAI guidelines and feedback from millions of users who have completed the update.
1. Update Photo During Significant Life Changes
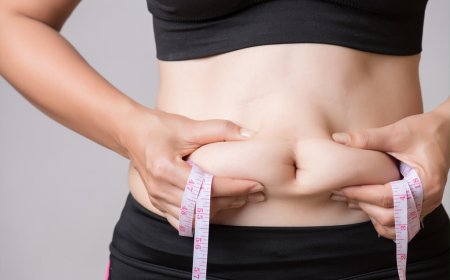
If youve undergone a major change in appearancesuch as significant weight loss or gain, facial surgery, beard removal, or hair transplantationit is advisable to update your photo as soon as possible. Delaying the update may result in failed authentication attempts when using Aadhaar for banking, travel, or government services.
2. Ensure Proper Lighting and Expression
During the photo capture at the enrollment center, avoid wearing hats, sunglasses, or heavy makeup. Ensure your face is well-lit and free of shadows. Maintain a neutral expressionsmiling or frowning can cause facial recognition systems to misidentify you. Keep your eyes open and directly facing the camera.
3. Use Original Documents
While only your Aadhaar number is required for a photo update, carrying original copies of your POI and POA documents can help resolve any identity verification issues quickly. Photocopies or digital scans are not accepted at the center.
4. Verify Mobile Number and Email Registration
Your Aadhaar must be linked to a valid mobile number and email address to receive updates and download your revised card. If your contact details are outdated, visit the enrollment center to update them simultaneously. This avoids having to make multiple trips.
5. Keep Your Acknowledgment Slip Safe
The acknowledgment slip contains a unique reference number that allows you to track the status of your update. Losing it may delay your ability to confirm completion. Store it digitally (take a photo) and physically (in your file) for future reference.
6. Avoid Multiple Updates in Quick Succession
UIDAI imposes a waiting period between demographic updates to prevent abuse. While there is no official rule for photo updates specifically, frequent requests may trigger internal review flags. Plan your update carefully and avoid unnecessary changes.
7. Download and Save the Updated Aadhaar PDF
After your photo is updated, immediately download the latest version of your Aadhaar from the UIDAI website. Save it in multiple secure locations: cloud storage, email, and a physical backup. This ensures you always have access to your current identity document.
8. Test Your Updated Aadhaar
After downloading your updated Aadhaar, use it in a low-stakes verification processsuch as a telecom service or e-KYC portalto confirm that your new photo is recognized. This gives you early assurance that the update was successful.
Tools and Resources
Successful completion of a photo update in Aadhaar relies on a combination of official tools, digital platforms, and physical resources. Here is a curated list of all essential tools and resources you will need.
Official UIDAI Portal
The primary resource for all Aadhaar-related services is the official website: https://uidai.gov.in. This portal provides access to:
- Locate Enrollment Centers
- Download Aadhaar (updated version)
- Check update status using the acknowledgment number
- Access help guides and FAQs
- Verify Aadhaar authenticity via the Verify Aadhaar feature
Aadhaar Enrollment Center Locator
Available on the UIDAI website, this tool allows you to search for centers by state, district, pin code, or center name. It displays operating hours, contact details, and whether appointments are required. Use this tool to minimize waiting time and plan your visit efficiently.
mAadhaar Mobile App
The mAadhaar app, available on Android and iOS, allows users to store a digital copy of their Aadhaar card. While the app cannot be used to update your photo, it is invaluable for accessing your updated card after processing. Download it from the Google Play Store or Apple App Store and link it to your Aadhaar number using OTP verification.
Document Scanner Apps
Apps like Adobe Scan, CamScanner, or Microsoft Lens can help you digitize your acknowledgment slip and supporting documents. Store these files securely in encrypted cloud folders (Google Drive, OneDrive) for easy retrieval.
Biometric Devices (For Organizations)
If you are a service provider (bank, telecom operator, employer) handling Aadhaar-based authentication, ensure your biometric devices are UIDAI-certified. Outdated or non-compliant devices may fail to recognize updated photos, leading to customer dissatisfaction. Regularly update device firmware and maintain compliance with UIDAI standards.
Internet Connection and PDF Reader
A stable internet connection is required to download your updated Aadhaar. Use a modern PDF reader like Adobe Acrobat Reader to view the document. Ensure your device can display high-resolution images clearly, as the photo is embedded in the PDF with high pixel density.
Photography Guidelines (For Reference)
UIDAI provides detailed photo specifications for enrollment centers. While you wont control the capture process, understanding these standards helps you prepare:
- Size: 35mm x 35mm
- Resolution: Minimum 300 dpi
- Background: Plain white or light-colored
- Face coverage: 80% of the frame
- Lighting: Even, no glare or shadows
- Expression: Neutral, mouth closed, eyes open
- Headwear: Only permitted for religious reasons
Real Examples
Understanding how others have successfully updated their Aadhaar photos can provide clarity and confidence. Below are three real-world scenarios that illustrate common situations and how they were resolved.
Example 1: Aging and Facial Changes
Mr. Arjun Patel, 68, from Pune, noticed that his Aadhaar photo from 2012 no longer resembled him. Due to natural aging, his hair had turned white, his face had become thinner, and he wore glasses regularly. When attempting to open a senior citizen pension account, the banks e-KYC system rejected his Aadhaar due to facial mismatch. He visited the nearest enrollment center, provided his Aadhaar number, and had his photo retaken. He was advised to wear his glasses during capture. Within 10 days, he received an updated PDF with his current appearance. He successfully accessed his pension benefits without further issues.
Example 2: Post-Surgery Appearance Change
Sunita Reddy, a 32-year-old teacher from Hyderabad, underwent reconstructive facial surgery following an accident. Her pre-surgery Aadhaar photo showed a significantly different facial structure. When she tried to renew her passport, the regional office flagged her documents for manual review due to discrepancy in facial features. She visited an enrollment center with her medical records (optional but helpful) and requested a photo update. The operator noted the medical context in the system. Her updated Aadhaar was processed in 7 days. She submitted the new PDF to the passport office, and her application was approved without delay.
Example 3: Professional Appearance Update
Rajesh Kumar, a corporate executive in Bengaluru, updated his Aadhaar photo to reflect his professional appearance. His original photo was taken when he was in college, with long hair and a beard. He wanted a clean-shaven, short-hair look for official use. He visited an enrollment center during his lunch break, had his photo captured in under 10 minutes, and downloaded the updated version the same week. He now uses this updated Aadhaar for all corporate onboarding, bank verifications, and digital signature processes. He reports zero authentication failures since the update.
Example 4: Avoiding a Scam
A woman in Jaipur received a call from someone claiming to be from Aadhaar Digital Services who offered to update her photo online for a fee of ?500. She was asked to share her Aadhaar number and OTP. Suspicious, she checked the UIDAI website and found no such service. She reported the incident to the local police cyber cell. Later, she visited an enrollment center herself and updated her photo free of charge. This example underscores the importance of using only official channels and never paying for Aadhaar updates.
FAQs
Can I update my Aadhaar photo online?
No, you cannot update your Aadhaar photo online through the Self Service Update Portal. Unlike address or mobile number changes, photo updates require in-person biometric authentication to ensure security and prevent fraud. The only way to update your photo is by visiting an authorized Aadhaar enrollment center.
Is there a fee to update my Aadhaar photo?
No, UIDAI does not charge any fee for updating your photo, name, address, or other demographic details. If any center asks for payment, it is unauthorized. Report such incidents to UIDAI via their official grievance portal.
How long does it take to update the photo in Aadhaar?
Typically, the update is processed within 5 to 15 working days. Once completed, you will receive an SMS or email notification if your registered mobile or email is active. You can also track the status using the acknowledgment number on the UIDAI website.
Do I need to carry my old Aadhaar card?
While not mandatory, it is highly recommended to carry your physical Aadhaar card or know your 12-digit Aadhaar number. This helps the operator locate your record quickly and reduces processing time.
Can I update my photo if I dont have a registered mobile number?
Yes, you can still update your photo. However, you will not receive SMS notifications about the update status. You can still track your update using the acknowledgment slip and the UIDAI website. It is advisable to update your mobile number during the same visit to avoid future communication issues.
What if my photo update is rejected?
If your photo is rejected due to poor quality (e.g., blur, shadow, headwear), you will be informed immediately at the center and given the option to retake it. If the rejection occurs after submission (rare), you will receive a notice via SMS or email. In such cases, visit the center again with your acknowledgment slip and request a re-submission.
Can I update my childs Aadhaar photo?
Yes, children under 5 years old can have their photo updated when they turn 5, and again at age 15. Parents or guardians can accompany the child to the enrollment center with proof of relationship (birth certificate, school ID). The process is identical to adult updates.
Will my old Aadhaar number change after updating my photo?
No, your Aadhaar number remains unchanged. Only the demographic detailssuch as photo, name, or addressare updated. Your unique 12-digit identifier stays the same for life.
Can I update my photo if I live abroad?
If you are an NRI, you can update your Aadhaar photo only if you are physically present in India. There are no overseas enrollment centers. Plan your visit during a trip to India to complete the update. Your Aadhaar remains valid even if you are abroad.
Is it mandatory to update my Aadhaar photo?
Updating your photo is not mandatory, but it is strongly recommended. If your photo no longer resembles you, you may face authentication failures during critical services such as banking, PAN linkage, or government subsidy disbursement. Keeping your photo current ensures seamless digital identity verification.
Can I update my photo multiple times?
Yes, you can update your photo more than once if your appearance changes significantly. However, frequent updates may trigger additional verification steps. UIDAI recommends updating only when necessary to maintain system integrity.
Conclusion
Updating your photo in Aadhaar is a simple yet crucial step in maintaining the accuracy and reliability of your digital identity. In a world where Aadhaar serves as the backbone of identity verification across financial, governmental, and private sectors, an outdated photograph can lead to unnecessary complications, delays, and even denial of services. By following the step-by-step process outlined in this guidevisiting an authorized enrollment center, ensuring proper documentation, and verifying the updateyou can ensure your Aadhaar remains a trusted and functional ID.
Remember: Aadhaar updates are free, secure, and designed for your convenience. Avoid third-party intermediaries, never pay for updates, and always rely on the official UIDAI portal. Regularly check your Aadhaar details and update them proactivelyespecially after major life changes. Doing so not only protects your identity but also ensures you never miss out on services you are entitled to.
Take action today. Locate your nearest enrollment center, prepare your documents, and update your photo. Your future selfand every institution that verifies your identitywill thank you.